How To Create a Full Stack app with SolidJS, Supabase, and TailwindCSS
I’m a software engineer specializing in building exceptional digital experiences.
Introduction
Hey Everyone,
In this tutorial, we are going to create a full stack Notes app with Solid.js and Supabase.
Let's get started
Setting Up Supabase
Click on New Project.
After Filling in all the project details.
Click on Create
Installing Solid
Now, that we have our supabase app running let's create the frontend of our app. we are going to use Solid.js in this app.
To Create a Solid.js App We are going to use this command.
npx degit solidjs/templates/js solid-appNow we are going to cd into
cd solid-appAfter that, we are going to install all the dependencies, In this tutorial I will be using
yarnbut you are free to usenpmorpnpm.Now Let's run and see what we have.
yarn dev
you will have your solid-app running -

Now we have everything running, let's add some packages which we are going to use to bring this app to life. I am a big fan of TailwindCSS, It helps me style my app pretty fast, I use it in every app. so let's do that.
Run this command in your terminal.
yarn add tailwindcss@latest postcss@latest autoprefixer@latest --devNext, generate your tailwind.config.js and postcss.config.js files
npx tailwindcss init -p
this command will create two files in your root directory: tailwind.config.js and postcss.config.js.
Now, Let's open the tailwind.config.js and update the purge property to include the path to our src folder and index.html file.
module.exports = {
  content: ['./index.html', './src/**/*.{js,ts,jsx,tsx}'],
  darkMode: false, // or 'media' or 'class'
  theme: {
    extend: {},
  },
  variants: {
    extend: {},
  },
  plugins: [],
}
Now, we will add the Tailwind's style using the @tailwind directive within you main CSS file (src/index.css)
/* ./src/index.css */
@tailwind base;
@tailwind components;
@tailwind utilities;
Now, we have TailwindCSS in our app.
- The next thing we need to add is
supabase-js
yarn add @supabase/supabase-js
Now, after adding these let's add the environment variables
VITE_SUPABASE_URL=YOUR_SUPABASE_URL
VITE_SUPABASE_ANON_KEY=YOUR_SUPABASE_ANON_KEY
at last, we need to create a Supabase Client which will help us in initializing the Supabase with our environment variables.
src/supabaseClient.jsx -
import { createClient } from '@supabase/supabase-js'

const supabaseUrl = import.meta.env.VITE_SUPABASE_URL
const supabaseAnonKey = import.meta.env.VITE_SUPABASE_ANON_KEY

export const supabase = createClient(supabaseUrl, supabaseAnonKey)
Authentication
let's start with adding authentication to our app,
we need to have different routes for different parts of our app, for example /login route will help us in handling authentication, and once authenticated we need to have the dashboard unlocked at / this route.
so to handle different routes we need to add @solidjs/router.
yarn add @solidjs/router
once we have our router we need to create a new router with a new component under components/login.jsx
components/login.jsx -
import { createEffect, createSignal } from "solid-js";
import { supabase } from "../supabaseClient";
import Button from "./button";
import { useNavigate } from "@solidjs/router";

const Login = () => {
  const [email, setEmail] = createSignal("");
  const [loading, setLoading] = createSignal(false);
  const navigate = useNavigate();

  createEffect(() => {
    if (supabase.auth.session()) {
      navigate("/");
    }
  });

  const handleLogin = async (e) => {
    e.preventDefault();
    try {
      setLoading(true);
      const { error } = await supabase.auth.signIn({ email: email() });
      if (error) throw error;
      alert("Check your email for the login link!");
    } catch (error) {
      alert(error.error_description || error.message);
    } finally {
      setLoading(false);
    }
  };

  return (
    <div className="flex mt-20 items-center justify-center">
      <div className="flex flex-col border p-4 rounded-lg shadow-lg w-64">
        <h1 className="text-2xl">Login.</h1>
        {loading() ? (
          "Sending magic link..."
        ) : (
          <>
            <input
              id="email"
              className="mt-2 border p-2 rounded-sm"
              type="email"
              placeholder="Your email"
              value={email()}
              onChange={(e) => setEmail(e.target.value)}
            ></input>
            <Button onClick={handleLogin}>Send Magic Link</Button>
          </>
        )}
      </div>
    </div>
  );
};

export default Login;
after creating our component we need to add the router to our src/index.jsx
src/index.jsx -
/* @refresh reload */
import { render } from "solid-js/web";
import "./index.css";
import App from "./App";
import { Router } from "@solidjs/router";

render(
  () => (
    <Router>
      <App />
    </Router>
  ),
  document.getElementById("root")
);
Now, we need to add the Routes to our app entry point which is src/App.jsx
src/App.jsx -
import { createSignal, createEffect } from "solid-js";
import Login from "./components/login";
import Dashboard from "./components/dashboard";
import { supabase } from "./supabaseClient";
import Button from "./components/button";
import { Routes, Route, useNavigate } from "@solidjs/router";
import AddNotes from "./components/AddNotes";
import EditNotes from "./components/EditNotes"

function App() {
  const [session, setSession] = createSignal(null);
  const navigate = useNavigate();

  createEffect(() => {
    setSession(supabase.auth.session());
    supabase.auth.onAuthStateChange((_event, session) => {
      setSession(session);
    });
  });

// If we don't have a supabase session we log in.
  createEffect(() => {
    if (!supabase.auth.session()) {
      navigate("/login");
    }
  });

  const handleLogout = () => {
    supabase.auth.signOut();
    navigate("/login");
  };

  return (
    <div className="container max-w-2xl mx-auto mt-10">
      <div className="flex items-center justify-between">
        <h1>solid-notes</h1>
        {session() && <Button onClick={handleLogout}>Logout</Button>}
      </div>
      <Routes>
        <Route path="/login" component={Login} />
      </Routes>
    </div>
  );
}

export default App;
Now, let's start our app.
yarn dev
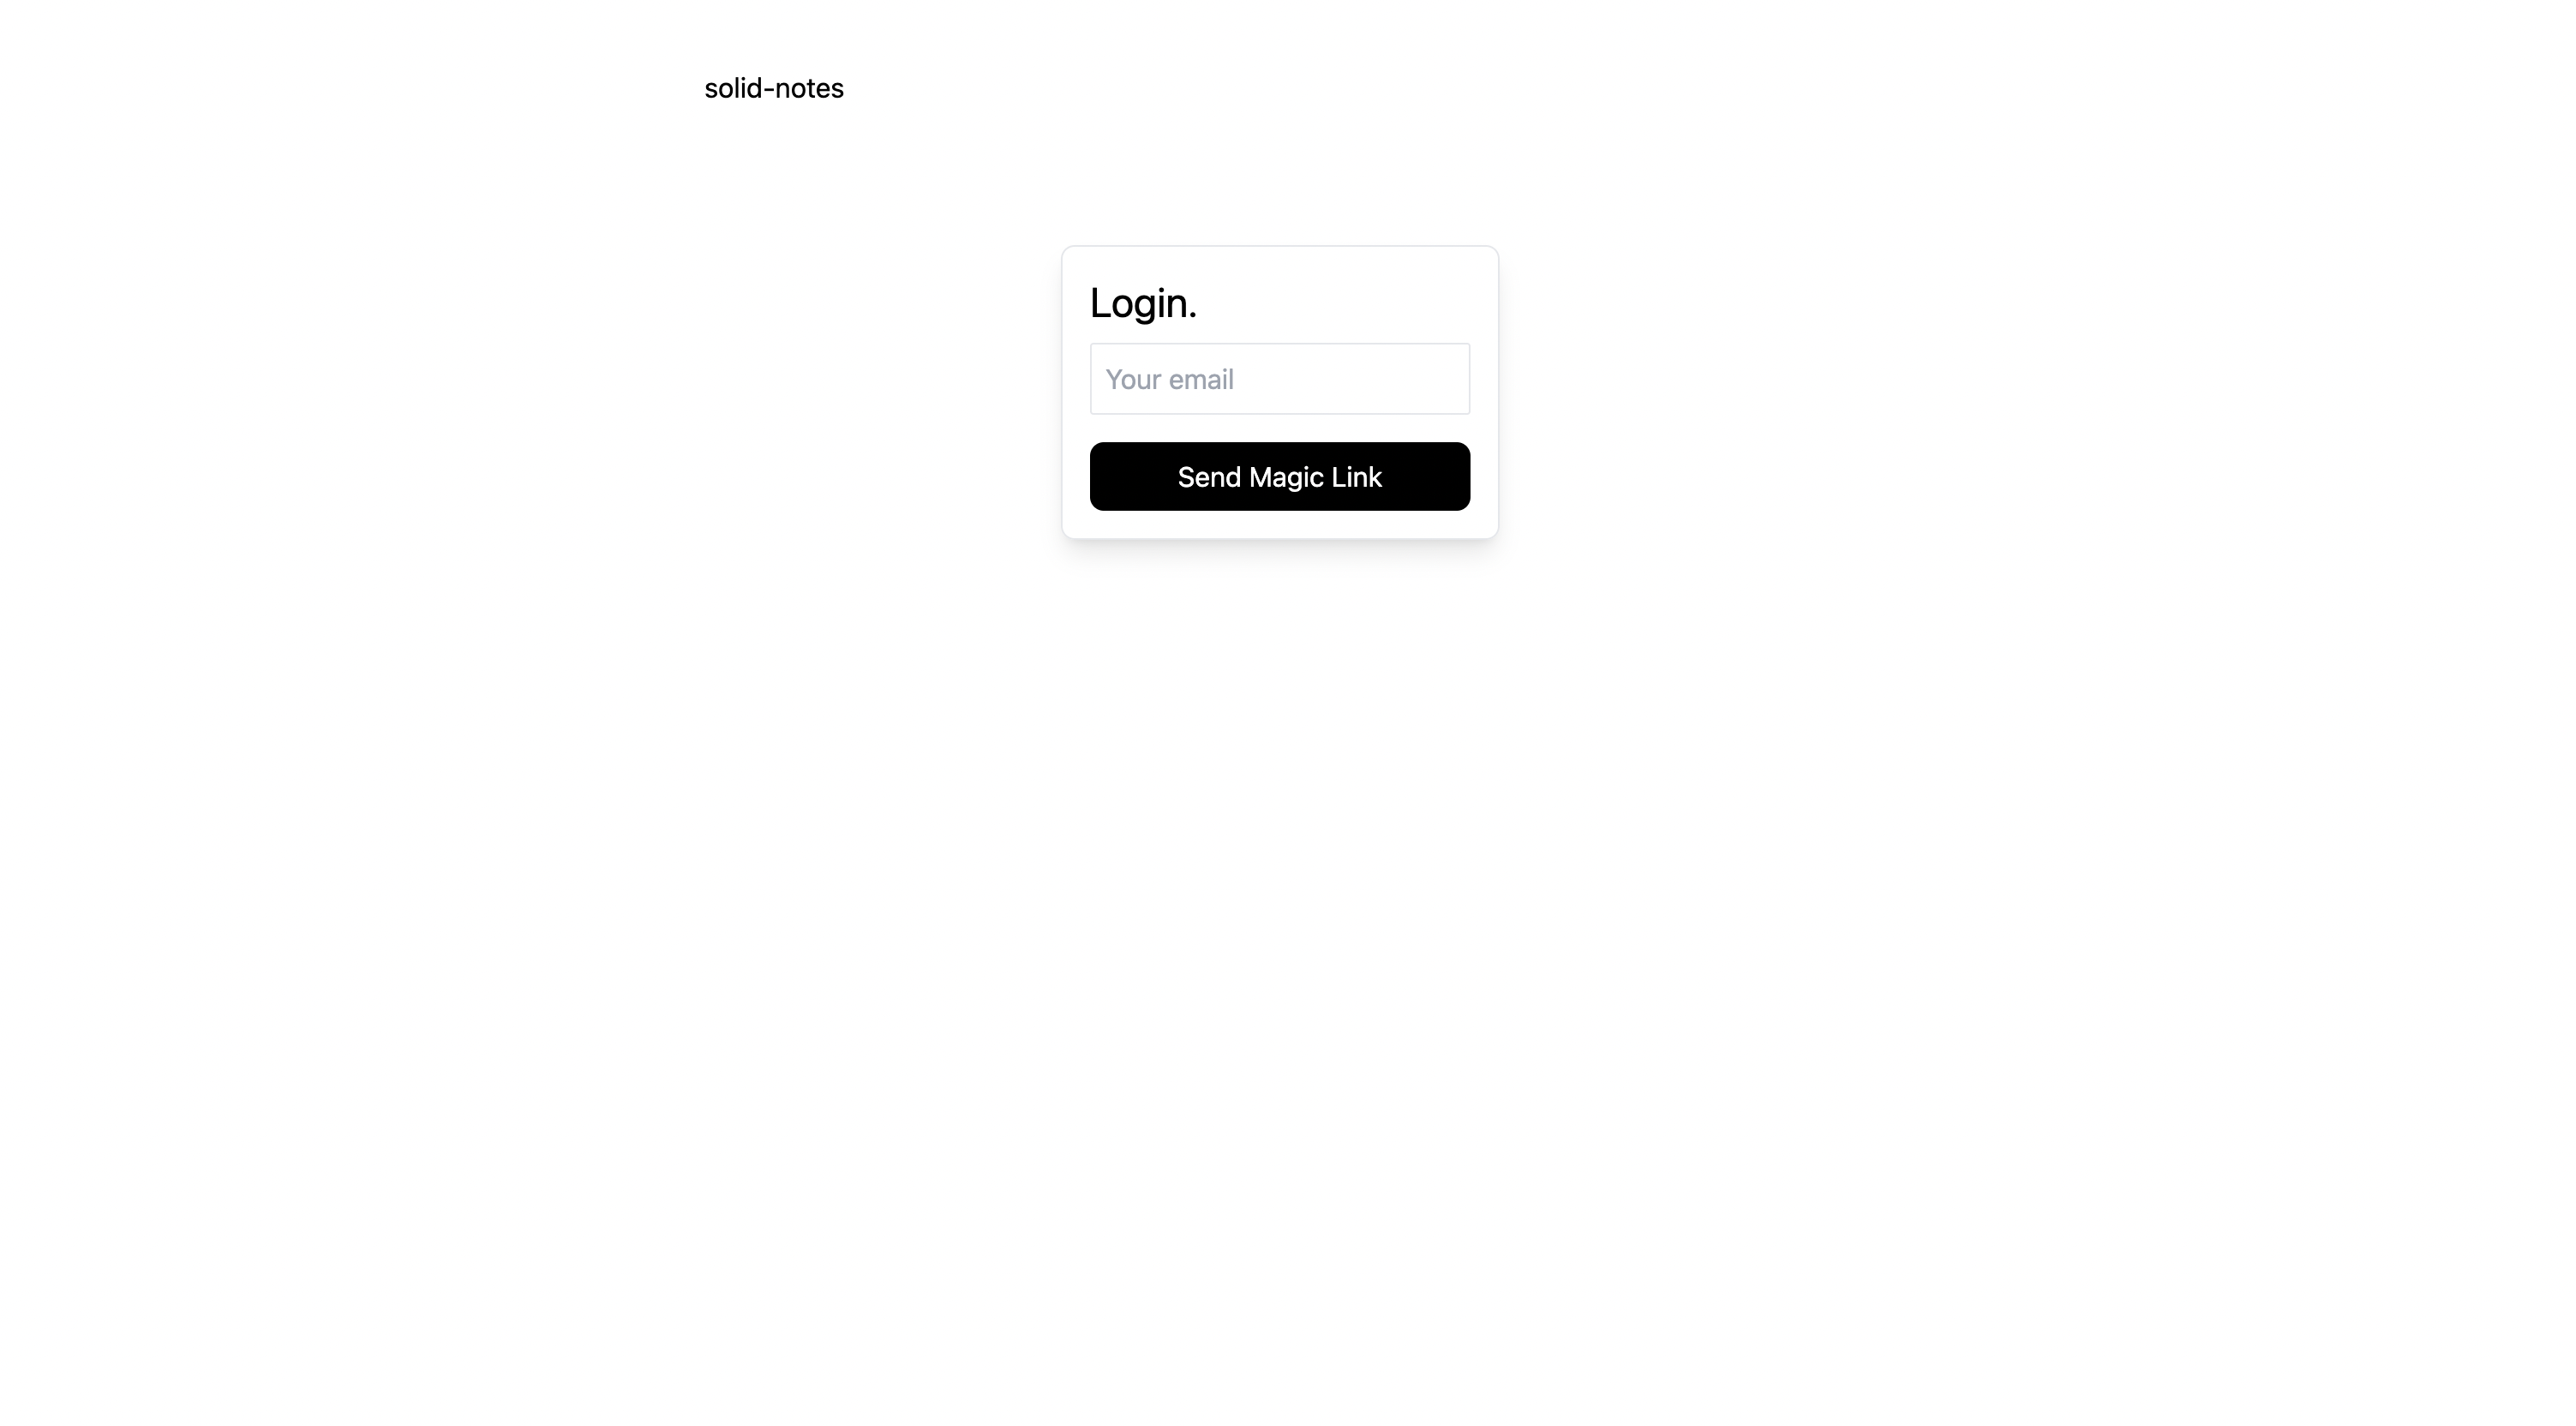
we will have something like this on screen and we can log in to our app.
CRUD
Now Let's Work on the core of our app.
we will start by creating notes
Create Notes
To, Create Notes we need to first create a table in our supabase database so that we can push our data to that table.
Go to your app dashboard in supabase
https://app.supabase.com/Go to the table editor and click on
New TableAfter that give it a name we are going to name it
notesin this tutorial but you can name it anything you like.Add two columns -
Title&Description- with Text Type.
Now, that we have our table setup, let's start adding some data to it.
Let's add all the route for all the component which we need we will add them as we go along in this tutorial.
// Add All The Routes
  <Routes>
        <Route path="/login" component={Login} />
        <Route path="/add" component={AddNotes} />
        <Route path="/edit">
          <Route path="/:id" component={EditNotes} />
        </Route>
        <Route path="/" component={Dashboard} />
 </Routes>
Let's create AddNotex.jsx component which will help us in adding notes.
src/AddNotes.jsx -
import { createSignal } from "solid-js";
import { supabase } from "../supabaseClient";
import Button from "./button";
import { useNavigate } from "@solidjs/router";

const AddNotes = () => {
  const navigate = useNavigate();
  const [title, setTitle] = createSignal("");
  const [description, setDescription] = createSignal("");

  const handleSave = async () => {
    if (title().length > 0 && description().length > 0) {
      try {
        await supabase
          .from("notes")
          .insert({ title: title(), description: description() });
      } catch (error) {
        console.error(error.message);
      }finally{
        navigate("/")
      }
    }
  };

  return (
    <div className="max-w-2xl flex items-center">
      <div className="flex flex-col w-full">
        <h1 className="text-2xl mt-5">Create Note</h1>
        <input
          value={title()}
          onChange={(e) => setTitle(e.target.value)}
          type="text"
          placeholder="Enter Title"
          className="border w-full rounded-md p-4 mt-2"
        />
        <textarea
          value={description()}
          onChange={(e) => setDescription(e.target.value)}
          className="mt-2 border rounded-md p-4"
          rows="5"
          placeholder="Notes Description"
        ></textarea>
        <Button onClick={handleSave} classes="py-5">
          Save
        </Button>
      </div>
    </div>
  );
};

export default AddNotes;
Preview-
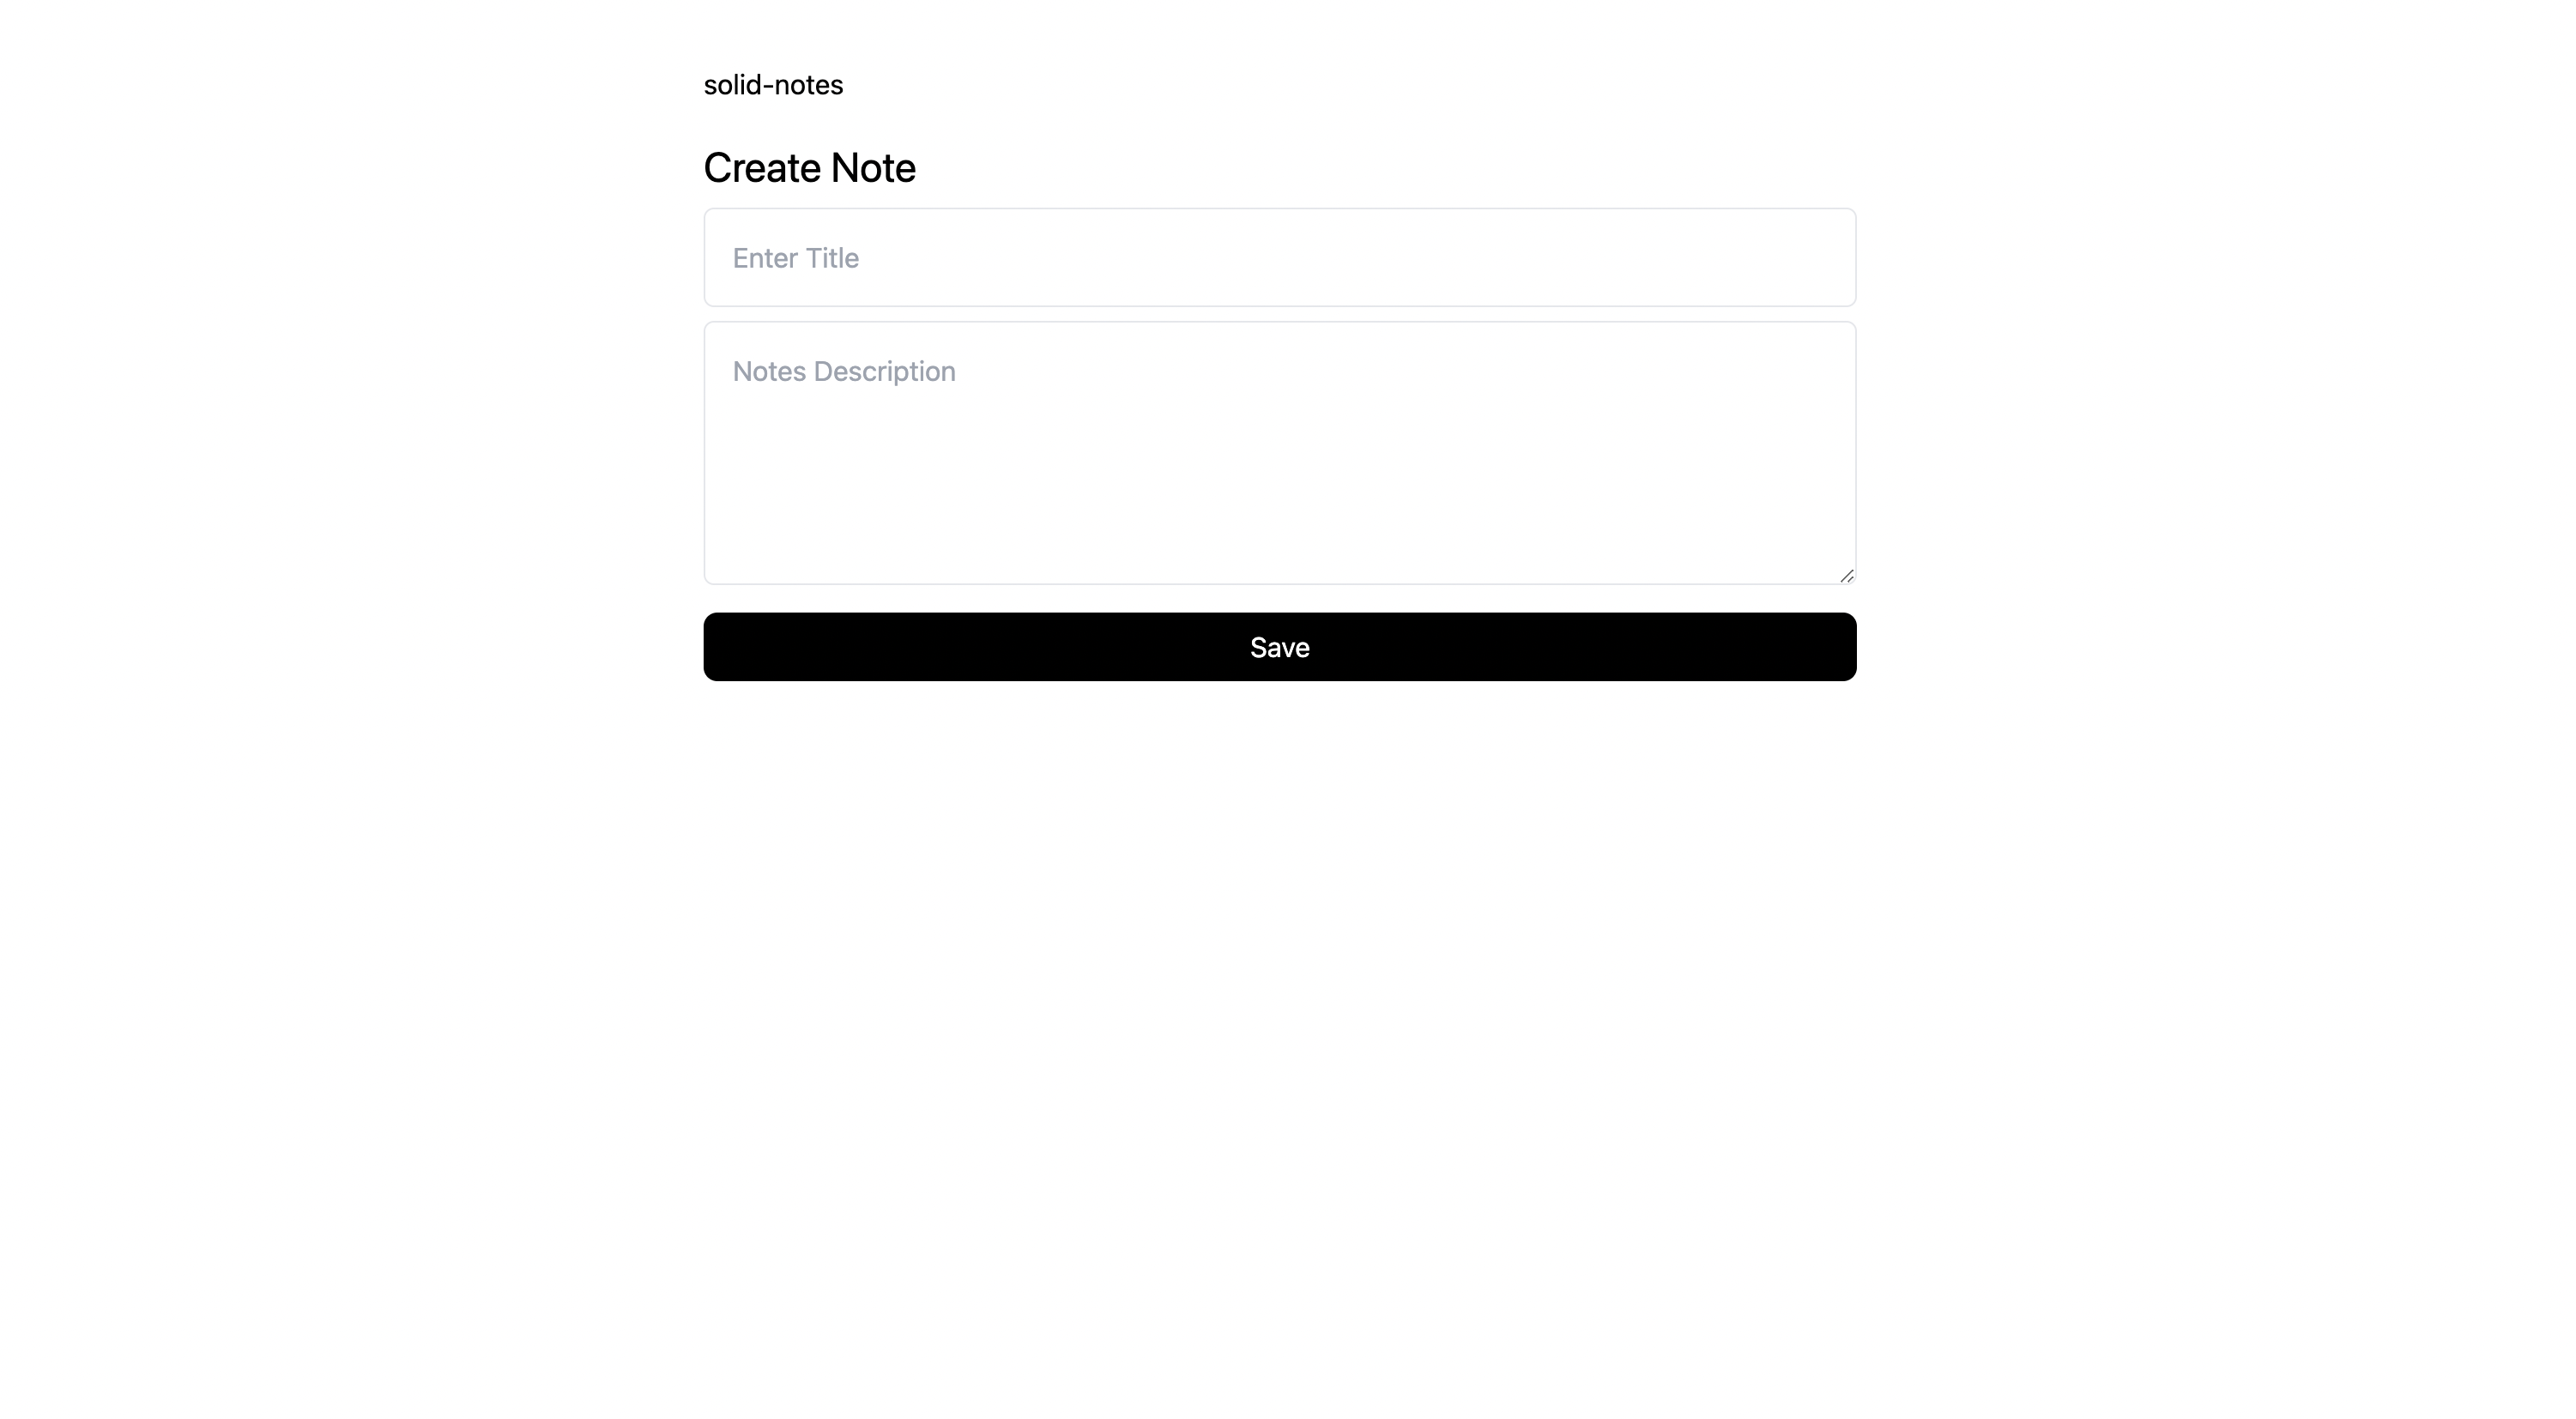
this component will allow us to add Notes to our app.
Read Notes
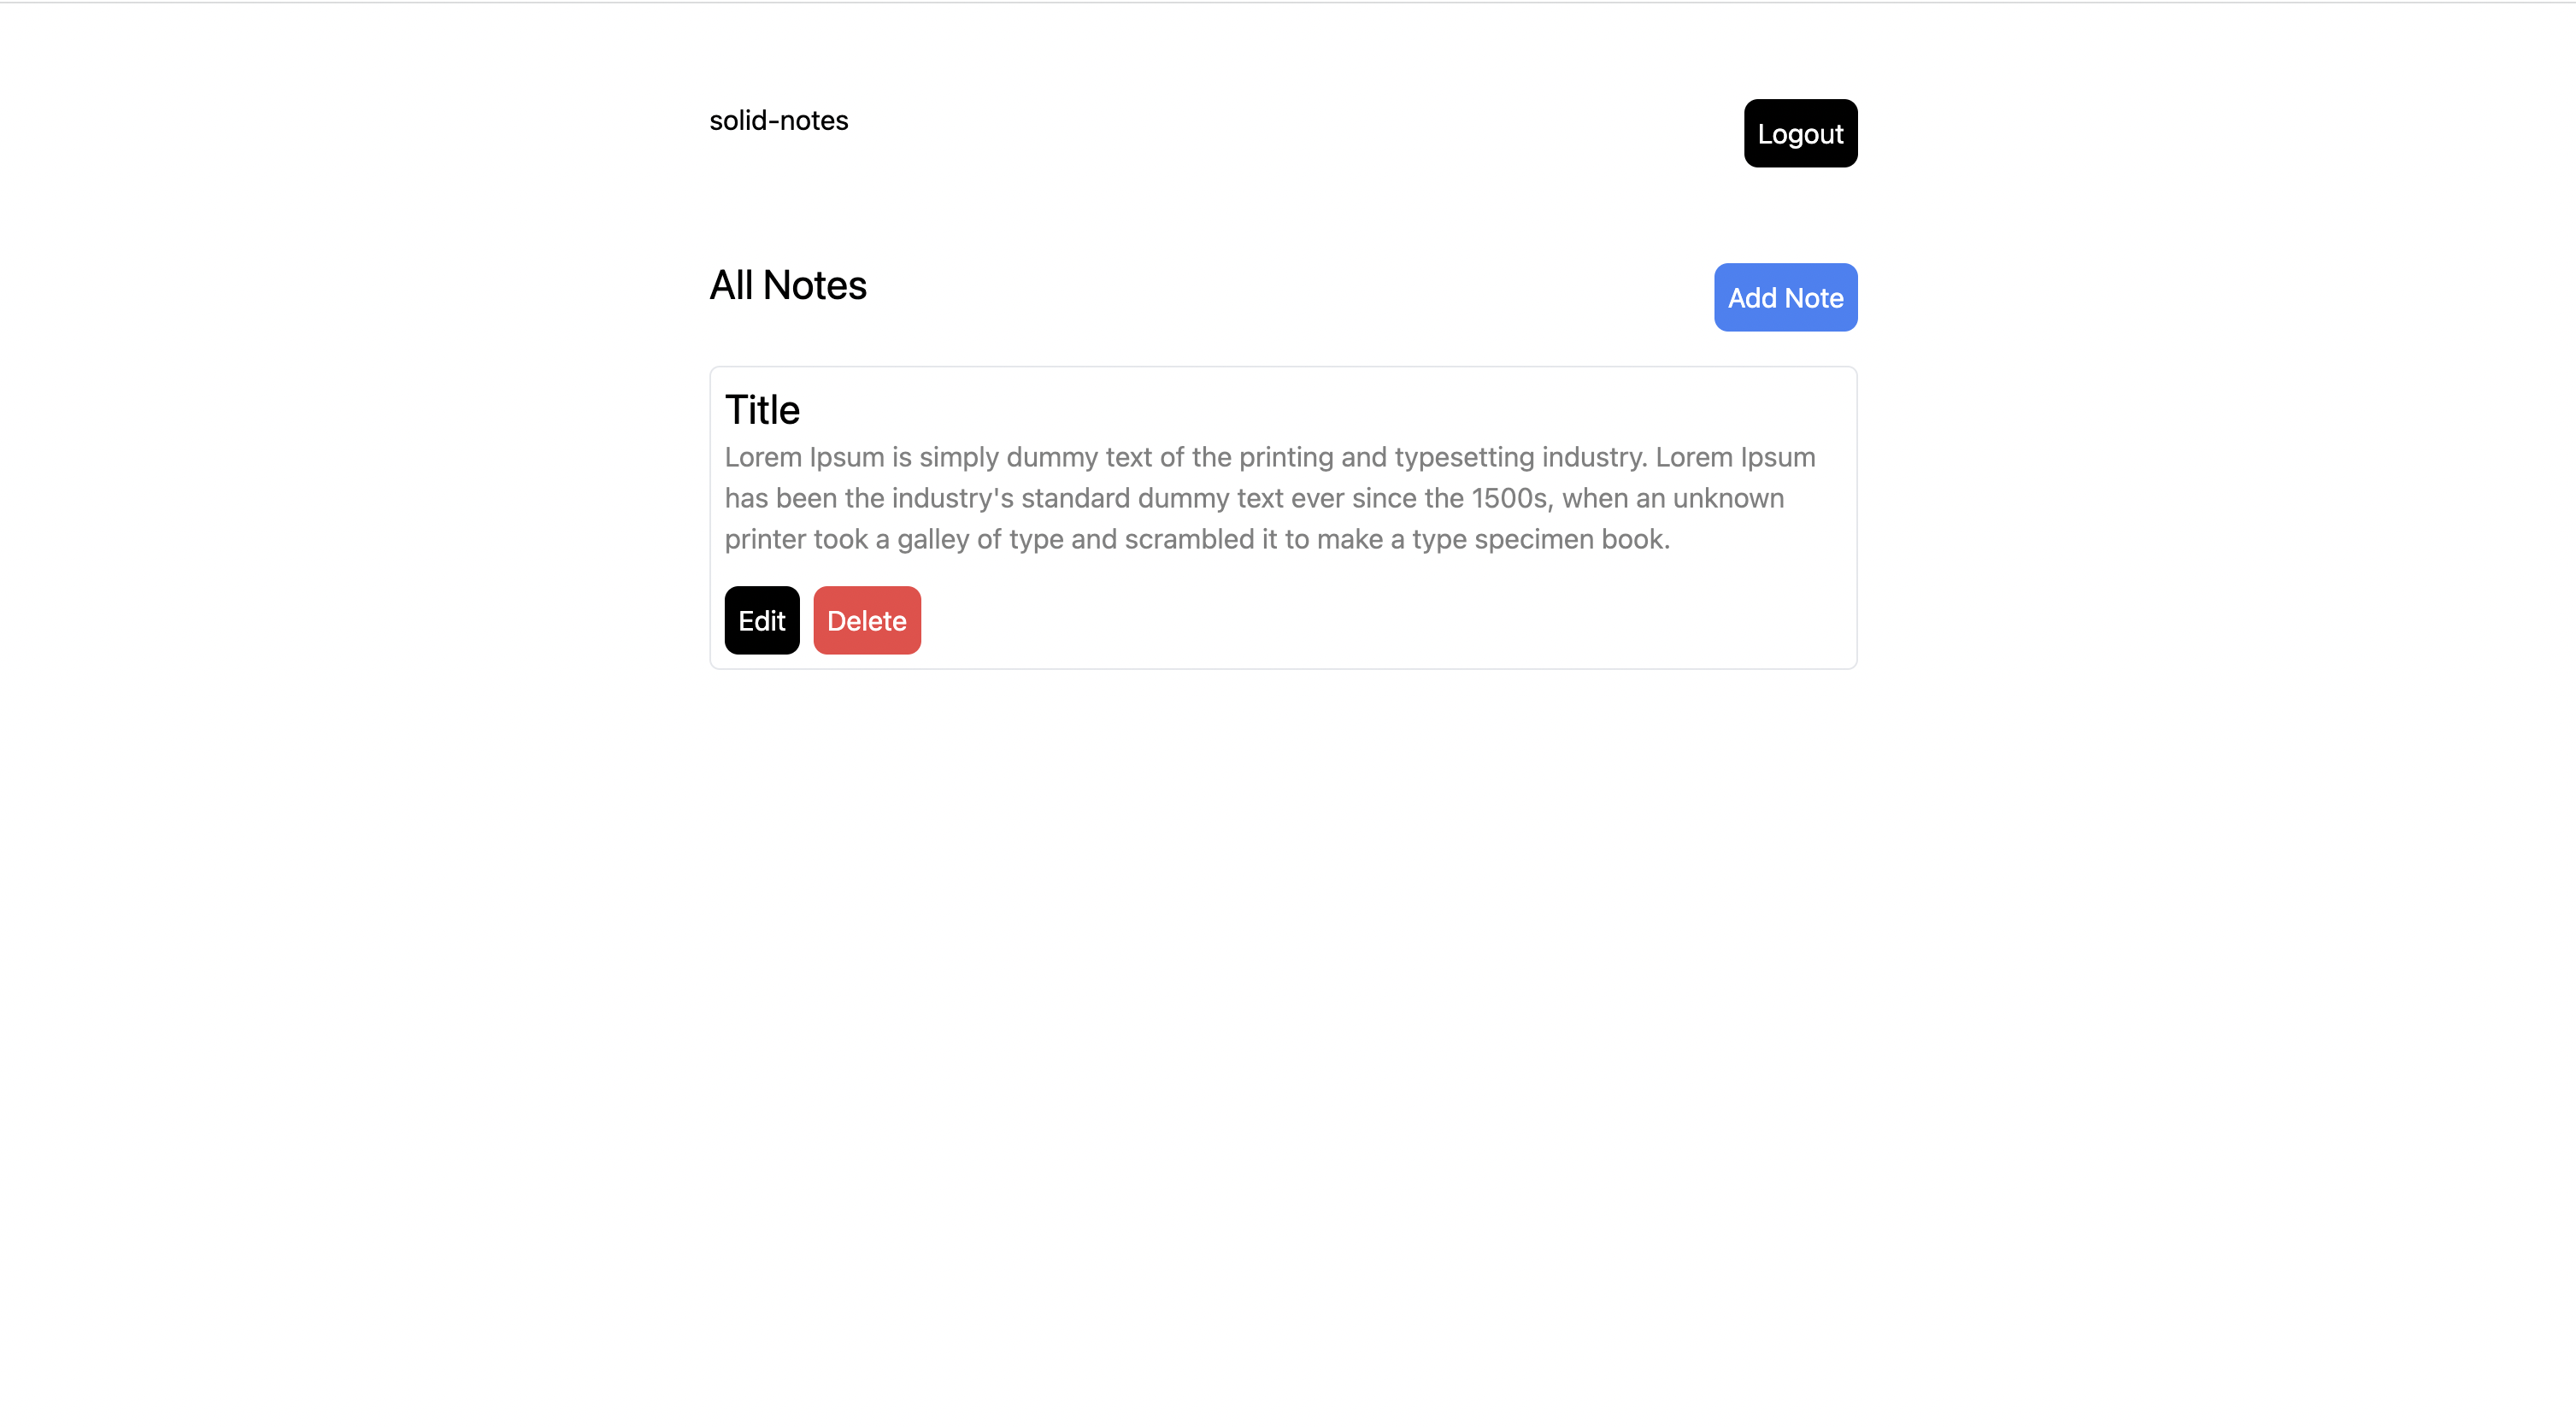
After Creating Some notes let's display those on our main route /.
Let's add the route for the dashboard and render all the notes for the preview.
components/dashboard.jsx -
import Button from "./button";
import Cards from "./cards";
import { useNavigate } from "@solidjs/router";
import { createEffect, createSignal } from "solid-js";
import { supabase } from "../supabaseClient";

const dashboard = () => {
  const navigate = useNavigate();
  const [notes, setNotes] = createSignal([]);

  const fetchNotes = async () => {
    try {
      const { data, error } = await supabase.from("notes").select("*");
      if (data) {
        setNotes(data);
      }
      if (error) {
        console.error(error.message);
      }
    } catch (error) {
      console.error(error.message);
    }
  };

  createEffect(async () => {
    await fetchNotes();
  }, []);

  return (
    <div className="mt-10 flex items-center justify-center">
      <div className="w-full">
        <div className="flex items-center justify-between">
          <h1 className="text-2xl">All Notes</h1>
          <Button onClick={() => navigate("/add")} classes="bg-blue-500">
            Add Note
          </Button>
        </div>
        {notes().length
          ? notes().map(({ id, title, description }) => (
              <Cards
                key={id}
                id={id}
                title={title}
                description={description}
                reload={fetchNotes}
              />
            ))
          : "Add a note to get started"}
      </div>
    </div>
  );
};

export default dashboard;
components/Cards.jsx -
import Button from "./button";
import { useNavigate } from "@solidjs/router";
import { supabase } from "../supabaseClient";

const Cards = ({ title, description, id, reload }) => {
  const navigate = useNavigate();

  return (
    <div className="w-full border p-2 mt-5 rounded-md">
      <h1 className="text-2xl">{title}</h1>
      <p className="opacity-50">{description}</p>
      <Button onClick={() => navigate(`/edit/${id}`)}>Edit</Button>
      <Button onClick={handleDelete} classes="bg-red-500 ml-2">
        Delete
      </Button>
    </div>
  );
};

export default Cards;
Preview -
Update Notes
Now, Let's need to add the edit route component (/edit) which helps us in editing the notes.
EditNotes.jsx -
import { createEffect, createSignal } from "solid-js";
import { supabase } from "../supabaseClient";
import Button from "./button";
import { useNavigate, useParams } from "@solidjs/router";

const EditNotes = () => {
  const navigate = useNavigate();
  const [title, setTitle] = createSignal("");
  const [description, setDescription] = createSignal("");
  const params = useParams();

  createEffect(async () => {
    try {
      const { data, error } = await supabase
        .from("notes")
        .select("title, description")
        .match({ id: params.id });

      setTitle(data[0].title);
      setDescription(data[0].description);
      if (error) {
        console.error(error.message);
      }
    } catch (error) {
      console.error(error.message);
    }
  }, []);

  const handleEdit = async () => {
    if (title().length > 0 && description().length > 0) {
      try {
        await supabase
          .from("notes")
          .update({ title: title(), description: description() })
          .match({ id: params.id });
      } catch (error) {
        console.error(error.message);
      } finally {
        navigate("/");
      }
    }
  };

  return (
    <div className=" max-w-2xl flex items-center">
      <div className="flex flex-col w-full">
        {title ? (
          <>
            <h1 className="text-2xl mt-5">Edit Note</h1>
            <input
              value={title()}
              onChange={(e) => setTitle(e.target.value)}
              type="text"
              placeholder="Update Title"
              className="border w-full rounded-md p-4 mt-2"
            />
            <textarea
              value={description()}
              onChange={(e) => setDescription(e.target.value)}
              className="mt-2 border rounded-md p-4"
              rows="5"
              placeholder="Update Description"
            ></textarea>
            <Button onClick={handleEdit} classes="py-5">
              Update
            </Button>
          </>
        ) : (
          "Loading..."
        )}
      </div>
    </div>
  );
};

export default EditNotes;
This component Will allow us to handle the editing part of our app.
Delete Notes
At last, we are going to handle deleting our notes.
for that, we will go to our cards.jsx component and add a new function called handleDelete which will delete the notes and fetch all the notes again.
cards.jsx -
import Button from "./button";
import { useNavigate } from "@solidjs/router";
import { supabase } from "../supabaseClient";

const Cards = ({ title, description, id, reload }) => {
  const navigate = useNavigate();
  const handleDelete = async () => {
    try {
      const { data, error } = await supabase
        .from("notes")
        .delete()
        .match({ id: id });
      if (data) {
        reload();
      }
    } catch (error) {
      console.error(error.message);
    }
  };
  return (
    <div className="w-full border p-2 mt-5 rounded-md">
      <h1 className="text-2xl">{title}</h1>
      <p className="opacity-50">{description}</p>
      <Button onClick={() => navigate(`/edit/${id}`)}>Edit</Button>
      <Button onClick={handleDelete} classes="bg-red-500 ml-2">
        Delete
      </Button>
    </div>
  );
};

export default Cards;
Conclusion
That's all I have for you! Hopefully, you learned something new.
Enjoy the rest of your day 👋


